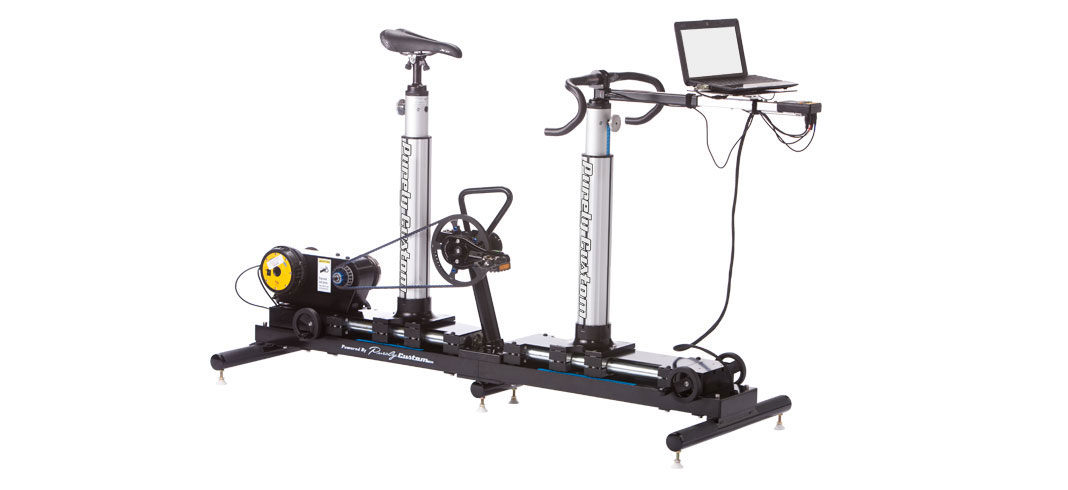
Is setting bike position a mystic art that requires motorized bike fitting jigs? Of course not!
Use the Greg Lemond formula to set your saddle height. Go for a ride. Adjust it, ride a bit more. Repeat until you find a comfortable and powerful position. Now do the same with your stem length. Don't be afraid of tinkering with your position.
Use the Greg Lemond formula to set your saddle height. Go for a ride. Adjust it, ride a bit more. Repeat until you find a comfortable and powerful position. Now do the same with your stem length. Don't be afraid of tinkering with your position.
It seems a little odd to use a formula to set saddle height. After all, there many variables which can affect the fit, such as leg length discrepancy, foot size, pedal and shoe choice, hamstring flexibility and personal preference.
That's true, but a formula gives a good starting point from which you can tweak to perfection. Remember, saddle height does not need to be static. Eddy Merckx was constantly fiddling with saddle height, even during races.
The system described below is advocated by Greg Lemond.
To find your inseam, stand on a hard floor against a wall in your socks. Place a book between your legs and push it firmly upwards, keeping an edge against the wall. There is no need to crush your bits. Firm pressure is enough. Mark the highest point of the book on the wall. This is your inseam measurement.
Multiply the measurement by 0.883. This is the distance you should set from the middle of your bottom bracket to the top of your seat. You may now adjust the position to get comfortable. Bear in mind that there will be measurement errors, so you can't expect to be accurate to the millimeter.
If you're wondering where to measure on the seat, then choose the middle part. This is usually in line with the seat tube. If the seat is curved, choose its lowest point.
Be sure to have your eye at the same height as the saddle when you read the measuring tape, as otherwise you will introduce a parallax error. (eg. If your eye is higher than the saddle, then you will set it too low.) Bikefitting.com makes a measuring tool that is more accurate than a tape measure.
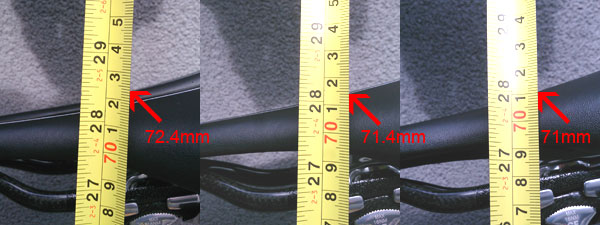
In these pictures then tape was not moved, but the camera was. Pictures were taken above the saddle (reading too high), level with the saddle (reading correct), and below the saddle (reading too low). Best of all is to use a custom jig to set the height.
The dorsiflexed foot position (toes pointing towards shin) is the one that best utilizes glute muscles, and is the most powerful and stable position. Having said that, some top riders pedal with toes down (Lance Armstrong) and some pedal with toes up (Brad Wiggins, Vino). It doesn't seem to make much difference at the end of the day. The body will adapt, so even if your position is a little off, you'll still ride well.
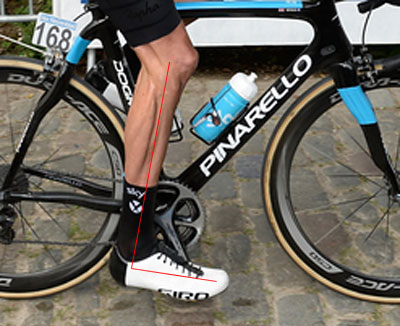
Brad Wiggins' foot position. Heel quite low; a dorsiflexed position which engages the powerful glutes.
If your saddle is too high, you may get pain at the back of the knee and will tend to rock while pedaling. You will probably end up drooped over one side of the saddle to compensate, which will result in other pains. If saddle is too low, front knee pain may arise.
Too high or too low also means that power is lost, so getting into the sweet spot is vital. The sweet spot is within a range of about 1/2 inch (1.3cm). Remember that moving forward and back on the saddle, changing shorts or wearing thermals over the top of shorts will affect your saddle height.
After years of adjusting my position I settled on a position that was comfortable and powerful. It actually correlated with this Lemond method, which is why I'm happy to recommend it. Get your seat height right; not too much weight on the arms; low at the front to be aero.
Cyclefit recommended a height about 3cm taller. They also wanted to shorten my stem by 3cm and raise my bars by 3cm. I did give it a try, but felt like I was pushing a shopping trolley. I got lower back ache and my backside got shredded due to the extra weight being put on it. I was as aerodynamic as a shopping trolley with baby seats. After 3 months I put the position back to how it was and all pains immediately stopped.
They do seem to know what they are talking about with their protractors, jigs, and certificates but sometimes when you've been riding for a long time you just have to go on personal feel. Sorry chaps - didn't work for me but I know of many happy customers.
At another place I was buying a frame and got a Bikefitting.com session included. The position was much more similar to that which I'm riding today, except that they recommended 2cm taller on the saddle.
You can use this table to save you the massive effort of multiplying your number by 0.883.
| Inseam/ inches | Inseam/cm | inseam * 0.883 / inches | Inseam x 0.883 / cm |
|---|---|---|---|
| 27.00 | 68.58 | 23.84 | 60.56 |
| 27.50 | 69.85 | 24.28 | 61.68 |
| 28.00 | 71.12 | 24.72 | 62.80 |
| 28.50 | 72.39 | 25.17 | 63.92 |
| 29.00 | 73.66 | 25.61 | 65.04 |
| 29.50 | 74.93 | 26.05 | 66.16 |
| 30.00 | 76.20 | 26.49 | 67.28 |
| 30.50 | 77.47 | 26.93 | 68.41 |
| 31.00 | 78.74 | 27.37 | 69.53 |
| 31.50 | 80.01 | 27.81 | 70.65 |
| 32.00 | 81.28 | 28.26 | 71.77 |
| 32.50 | 82.55 | 28.70 | 72.89 |
| 33.00 | 83.82 | 29.14 | 74.01 |
| 33.50 | 85.09 | 29.58 | 75.13 |
| 34.00 | 86.36 | 30.02 | 76.26 |
| 34.50 | 87.63 | 30.46 | 77.38 |
| 35.00 | 88.90 | 30.91 | 78.50 |
| 35.50 | 90.17 | 31.35 | 79.62 |
| 36.00 | 91.44 | 31.79 | 80.74 |
| 36.50 | 92.71 | 32.23 | 81.86 |
| 37.00 | 93.98 | 32.67 | 82.98 |
| 37.50 | 95.25 | 33.11 | 84.11 |
| 38.00 | 96.52 | 33.55 | 85.23 |
| 38.50 | 97.79 | 34.00 | 86.35 |
| 39.00 | 99.06 | 34.44 | 87.47 |
| 39.50 | 100.33 | 34.88 | 88.59 |
| 40.00 | 101.60 | 35.32 | 89.71 |
| 40.50 | 102.87 | 35.76 | 90.83 |
| 41.00 | 104.14 | 36.20 | 91.96 |
| 41.50 | 105.41 | 36.64 | 93.08 |
| 42.00 | 106.68 | 37.09 | 94.20 |
Once you have set your position, go for a ride and get used to it. Ride gentle as riding hard in a new position can result in tendon soreness. Bring an allen key with you. After some riding you may want to adjust the height until it feels just right.
Larger feet - raise saddle. Cleats back on shoe - lower saddle a bit. Low stack height (that's the distance between foot and pedal) lower saddle. Heel down foot position - lower saddle. You have to adjust to suit.
The usual mistake I see is riders with their saddle too high rather than too low.
Note that the saddle should be level or slightly nose down. If your saddle top is curved, then use the middle third of the saddle to make the angle judgement. A spirit level is a handy tool here.
Traditional wisdom says that the saddle's fore and aft setting should be set so that the front of your knee is above the pedal axle when it is at 3 or 9 o'clock (ie. pointing horizontally forward). It is not necessary to strictly adhere to this. Just put the saddle in the middle of the seat post clamp and see how it feels. Adjust from there. Most saddles are designed for the rider to slide forwards or backwards when they ride. You want to get in a position where your sit bones are on the part of the saddle designed to support them, rather than perched on the saddle nose.
Crank length
The standard length of cranks is 172.5mm. Taller riders might opt for 180mm and shorter riders 165mm. However there does not seem to be evidence to confirm whether these lengths result in the best power. Greame Obree recommends short cranks - perhaps down to 150mm. As more information becomes available I will update you.
Front end of bike
Once the saddle is positioned nicely, take a look at the front end of your bike. Pro riders usually put the stem as far down as it will go. Some even use a frame a size too small to get even lower. Bike fitters will measure your hamstring flexibility, shake their heads and raise your bars by 5cm. I prefer the stem to be low, then train in that position on the drops to become used to it.
Raising the bars will turn you into an aerodynamic breeze block. You'll look like a MAMIL (or Sportive rider) and it will throw more weight onto your backside which can result in more torture than necessary.
You can start with the bars high, but aim to drop them little by little. Your neck and hands will get used to it.
Changing stem length is a little more tricky since you can't simply adjust it. Try to borrow a stem of different length. I've solved this issue by buying a few stems. If bars are changed or a friend borrows a bike, I can change the stem. Remember that the reach of your bars and brake lever type can affect the length of stem by 2cm.
When your reach is correct, it will feel stretched out yet comfortable.
Gym work will help to keep imbalances and aches at bay.
For bar width, have a look at my handlebar article.
Conclusion
There you go: saved you $300 for a bike fit. A bike fit can be useful if you have some injury issues, but otherwise just set the saddle, slam the stem and train your body to ride long and low. Mark Cavendish never won any sprints with his bars in a 'gentlemanly' position.
Links
www.cyclefit.co.uk These guys really know their stuff. However they have a tendency to set the bars too high. They can cure you of position induced pain. Useful info on knee pain here.
www.bikefitting.com This system was pretty easy. Some measurements were plugged into a computer and the result churned out according to a formula. Excellent FAQS section and here is the saddle measuring tool.